

Why read this article? You will find accessible methods and practical tips for adjusting your instrument’s sound while respecting its original design.
The steel tongue drum is designed to stay in tune: its tuning is set mainly when the tongues are cut during manufacture. However, you can change the pitch of its notes by adding magnets or slightly extending the cuts.
Be aware of the limits: lowering a frequency is safer than trying to raise it, which requires removing material. Use a reliable electronic tuner instead of relying only on your ear.
The following sections cover preparation, tools, techniques you can follow step by step, risks to consider, and scale options. For a complete practical guide, see this dedicated page as well.
Why tune a tongue drum, and when is it useful?
Even without heavy use, a note’s frequency can drift over time.
The signs are usually easy to spot. After transport, an impact, or a fall, a tongue may bend and change a note’s pitch. Sometimes an instrument leaves the workshop slightly out of tune; a fine adjustment can restore the scale’s consistency.
Some players also want to change the reference pitch, moving from 440 Hz to 432 Hz or 528 Hz for a different sound. This means adjusting every note to preserve harmony.
Regular care helps limit drift. Wiping the instrument with a cloth after each session and applying an oil suited to its material help it remain stable. A good case and occasional checks often delay the need for adjustment.
Example: a musician notices that one note vibrates differently. Checking it with a tuner and making a slight adjustment is often enough.
| Cause | Symptom | Recommended action |
|---|---|---|
| Transport or impact | Out-of-tune note | Check and fine-tune |
| Drift over time | Unstable frequency | Regular care and oiling |
| Artistic choice | Desire for a specific key | Readjust the entire scale |
To learn more, read everything you need to know about the tongue drum.
Preparing to tune: tools, workspace, and reference settings
Before making any adjustments, set up your workspace and check your pitch references. Good tuning starts with suitable tools and a quiet setting.
Electronic tuner, tuning fork, or app: which should you choose?
Chromatic electronic tuner: recommended for a stable pitch reading. It shows differences in cents and lets you set the reference frequency. Dedicated tuners are more reliable than mobile apps.
Tuning fork: useful as an occasional reference for checking a key note. It needs no power, but changing reference frequencies frequently requires a trained ear.
Mobile apps: convenient now and then, but microphone quality affects the results. Choose a reputable app and check its calibration.
Setting the reference: 440 Hz, 432 Hz, or 528 Hz
Calibrate the tuner before you begin: choose 440 Hz, 432 Hz, or 528 Hz according to your musical practice.
Before each measurement, double-check that the device is still set to the intended reference. Writing down the target key helps keep the session consistent.
Setting up the instrument: support, mallets, and calibration
Prepare a stable support, such as a cushion or silicone stand, to avoid unwanted resonance. Place the instrument in the center of the work surface.
Use soft rubber mallets for a consistent strike. Hit the tongue with moderate force and let the note settle before reading the value.
- Caution: work on one note at a time and avoid sources of noise.
- Wipe the surface with a dry cloth before making adjustments to remove dirt and help prevent steel corrosion.

| Tool | Advantage | Limitation |
|---|---|---|
| Electronic tuner | Precise, adjustable reference frequency | Cost |
| Tuning fork | Reliable, requires no electricity | Requires a trained ear |
| Mobile app | Convenient and quick | Limited by microphone quality |
For more on converting to 432 Hz, see this specialist guide.
How to tune a tongue drum: methods and tips
Start by listening to and recording each note to determine what needs correcting.
Identify the notes to correct
Play each tongue separately and record the tuner’s reading. Note the difference in cents to decide which adjustments to make first.
- Always strike the same spot with the same force to get consistent measurements.
- Rank the differences: address large deviations first, then make fine adjustments.
Adjust gradually
Make small adjustments: press gently, attach a small magnet, or file away very little material. After each change, play the tongue again and check the note with the tuner.
Caution: several small corrections are better than one large one. Record each step and the difference in cents before and after it so you can track its effect.
Check the overall harmony
Once you have made the corrections, play melodic sequences and a few patterns from the scale. The display helps you center the frequency, but listening reveals whether the notes work together musically.
Example: correct the tonic and dominant first, then refine the notes between them so the instrument sounds even.
Tuning techniques step by step: bending, magnets, a hacksaw, and construction
This section explains how to change a tongue’s pitch without compromising the instrument.
Controlled bending: insert a thin tool, such as a narrow blade, beneath the tongue and put a soft cloth between the tool and the metal. Bend it very slightly to correct a few cents at a time. Check the note immediately with the tuner; do not force it, as the tongue could break.
Adding neodymium magnets: use small magnets to adjust the frequency by hand. Place them on the inside, at the center of the tongue. Stack them if more weight is needed.
Move the magnet up or down a millimeter at a time to refine the note. Remember: adding mass lowers the pitch; it cannot raise it.
Extending the cut with a saw: insert a thin blade into the slit and extend it very slightly. Measure the note after each pass. This is irreversible but effective for lowering the pitch.
Construction and material choices: the effective size of the tongues and the type of steel determine the instrument’s range. A smaller overall diameter produces higher notes; tongue dimensions matter more than their shape.

| Technique | Effect | Limitation | Recommended use |
|---|---|---|---|
| Slight bending | Correction of a few cents | Risk of breakage if excessive | Fine-tuning |
| Neodymium magnets | Lowers the frequency | Cannot raise the pitch | Quick adjustments |
| Hacksaw | Longer slit: lower notes | Irreversible | Major correction |
Limits, risks, and mistakes to avoid when tuning a steel tongue drum
Changing a steel tongue drum’s range requires care and a methodical approach. Before making any changes, understand what can be done without compromising the instrument.
What you can and cannot do:
- To produce lower notes, you can add mass with magnets or lengthen the slit.
- To raise a note, material must be removed by filing. Leave this irreversible operation to a professional.
Common mistakes to avoid:
- Excessive bending weakens the tongue and can cause a crack.
- Off-center magnets impair vibration and create unwanted sounds.
- Rushed adjustments without measuring after each change often lead to costly mistakes.
Good practice: make one adjustment at a time, check the note with a tuner, then listen to it. Move magnets a millimeter at a time and, where possible, symmetrically to preserve a clear tone.
Caution: some pitch changes result from environmental conditions, particularly temperature and humidity. In those cases, better storage conditions may be enough without retuning.

| Risk | Consequence | Solution |
|---|---|---|
| Excessive bending | Cracking or breakage | Stop and consult a professional |
| Off-center magnet | Unwanted sounds | Recenter or remove the magnet |
| Rushed corrections | Unbalanced scale | Measure after each adjustment |
For step-by-step instructions and reference points, see how to tune a tongue drum.
Keeping it in tune over time: care, corrosion, and good habits
Preserving accurate pitch starts with simple, regular habits. Daily care helps limit corrosion and keep frequencies stable.
Regular care: always wipe the instrument with a soft cloth immediately after each session. This removes sweat and moisture that can attack the metal.
Every 2 to 4 weeks, apply a thin layer of oil or wax suited to the material. This protective barrier helps preserve the surface.
Match care to the material
Stainless steel: less prone to corrosion; use a light oil or natural wax to retain its shine.
Painted or chrome-plated steel: clean it gently and watch for wear in the coating. Oil can protect the paint without damaging it.
Nitrided steel: this finish needs frequent care. Applying oil and wax helps prevent stains and oxidation.
Transport, climate, and storage
Use a padded bag or hard case when traveling. Avoid prolonged sun exposure and large temperature changes.
In humid conditions, place silica gel packets in the bag. Store the instrument at a stable temperature to help it stay in tune longer.
Rust removal
If rust appears, clean the area gently with alcohol, rub very lightly if necessary, then immediately protect the surface with a suitable oil.
Why it matters: a clean, protected instrument holds its pitch better. Good care can also reduce how often it needs retuning and extend its life.
| Action | Frequency | Applicable materials |
|---|---|---|
| Wipe with a soft cloth | After every session | All: stainless, painted, and nitrided steel |
| Apply a thin layer of oil or wax | Every 2 to 4 weeks | Stainless, painted or chrome-plated, and nitrided steel |
| Protect during transport | Every trip | All |
| Rust treatment: alcohol and oil | As needed | Painted or chrome-plated steel and nitrided steel |
For practical advice on tuning and thorough care, see this dedicated guide.
Other options: tunable models, professional costs, and choosing a scale
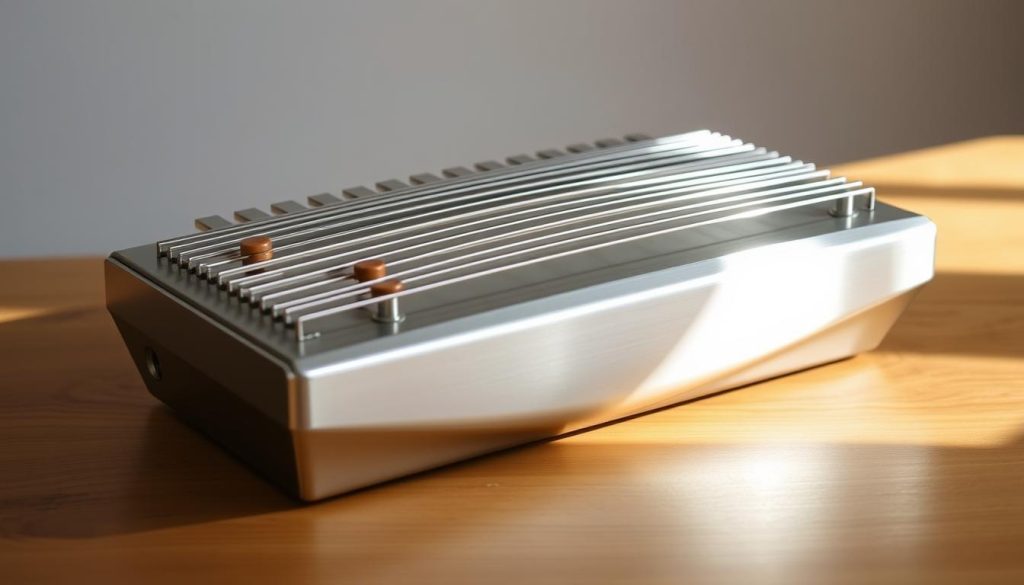
Being able to change scales without filing or welding makes life much easier for a musician. Some models have magnet adjustment systems with placement markers. They let you change the key or scale without removing material.
Magnet-tunable models: advantages, limits, and price
Advantage: immediate flexibility, ideal if you want to vary the sound. Moving the magnets changes the mass and lowers a note’s pitch.
Limitations: a restricted choice of scales, the need to stop playing to reposition magnets, and a high price of about €400 to €500 for an instrument roughly 30 cm across with 8 notes.
Having a professional retune the instrument: budget and recommendations
For corrections beyond small adjustments, consult an instrument maker. The average cost to retune a tongue drum ranges from €50 to €200, depending on its size and the amount of work required.
Choosing a key and scale for your playing
For beginners, choose a pentatonic scale in C major or A minor. It makes improvisation easier and helps avoid dissonance.
- If you like changing scales often, choose a model with magnets.
- If you want good sound projection and excellent stability, choose a well-tuned fixed-pitch instrument.
- Work in a quiet space and keep an electronic tuner handy so you can position the magnets precisely.
“Modularity offers quick freedom, but the original quality remains the benchmark.”
For a complete guide to tuning a tongue drum, follow this link and adapt your choice to your musical practice.
Conclusion
The key to a good result is making small adjustments and checking them every time.
Work on each tongue patiently. Measure the effect of each change with a tuner and record the difference. Favor small corrections so you can proceed with less risk.
Main methods: add magnets to lower the frequency, bend a tongue slightly for minor corrections, and extend the slit only as a last resort.
Care extends the instrument’s life: regular cleaning, a thin layer of oil, and careful transport all help stabilize its tuning.
If the required corrections go beyond simple adjustments, entrust the instrument to a specialist, at an estimated cost of €50 to €200. With a methodical approach, careful listening, and caution, you can bring out the steel tongue drum’s full musical potential.